Grade 2
Lesson 1: "What is art?"
Project: Marble rolling prints
Students viewed a series of photos and decided whether or not the depictions were works of art. Each student shared their own opinion on their piece, in terms of design, giving reasons for considering it successful or unsuccessful. Some works were straight forward, such as a famous painting or sculpture. Others required deeper thought and consideration, such as Marcel Duchamp's "Fountain". Students really enjoyed listening to each others' opinions and were eager to participate in the discussion.
Students created prints by placing a piece of colored paper inside a box, dipping a marble in black tempera paint, dropping it inside the box and shaking it back and forth. After a few shakes, students opened the box to reveal their inked paper. Other than following simple directions in order to complete the project, students were told not to put much thought into what the piece was about or why they were making it. After the prints were completed, we discussed whether or not we considered them art due to the fact that there truly was no intended meaning or emotion connected to the pieces. Most students agreed that we had attempted to make art, but that the result was not terribly successful. Then we arranged our index card sized pieces together on a tabletop and discussed how they work together to create a more successful work of art.
But what could we make?! As a team, the entire second grade brainstormed and decided that their small prints would work well together to create a fall themed project. We looked to nature for inspiration and an idea was born. See project 2!
Lesson 2: Sculpture in the Round
Project: Free standing paper mache maple tree
We are making a free standing tree sculpture. Our prints were transformed into maple leaves and more were created to make our tree appear fuller. After we created the leaves, we used recyclable materials, including cardboard tubes, paper towels, 2x4" wood carpentry scraps, old coat hangers, and scrap construction paper to make the armature and paper mache layer of our tree trunk and branches. We finished up by painting our tree and attaching the leaves. The finished product will is on display in the SCS Media Center.

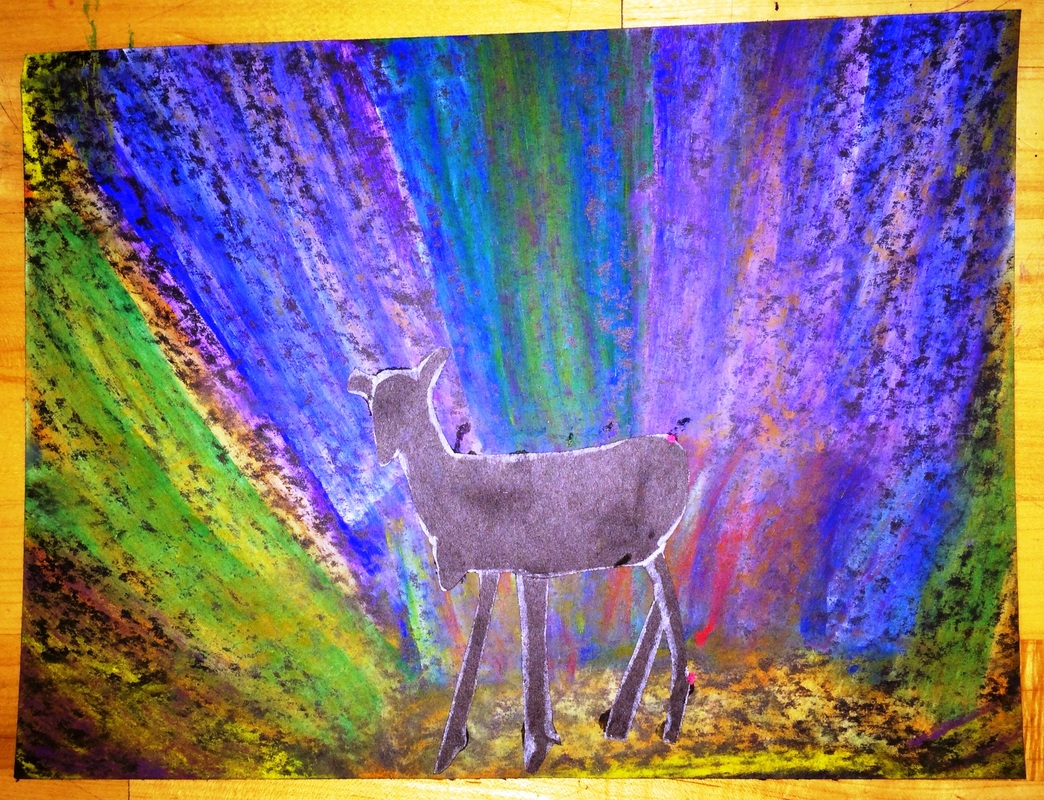
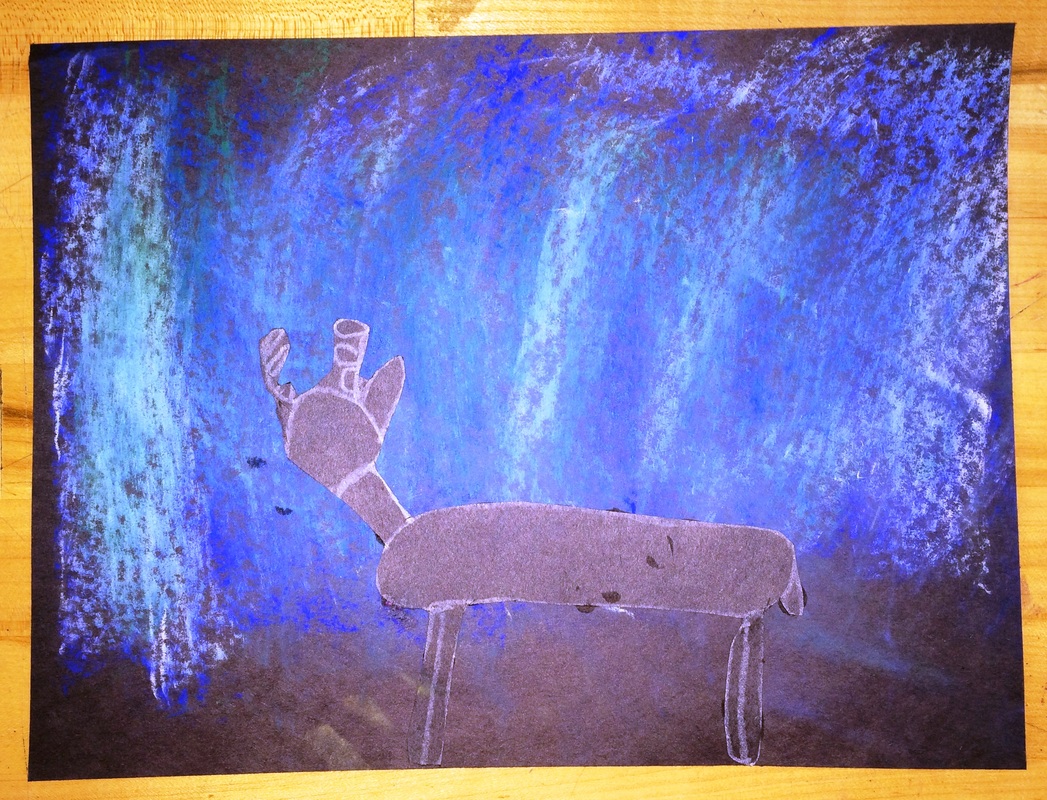
Lesson 3: Exploring Chalk Pastels
Project: The Northern Lights
Often times, in art class, we find ourselves studying maps and the globe. This time, we took a look at Alaska. We read a book about the type of climate and animals in Alaska at various times of the year. We discovered that it is a great place to view the Aurora Borealis. We tried out a new medium, called chalk pastels. (The sure are messy!!) Chalk pastels create beautiful vibrant color on dark surfaces. Once we decided that we would like to depict the Northern Lights using the pastels, we looked through various images of them. (It sounded like a firework show in the art room with all the "OOOOHs" and "AAAAHs".)
In order to create an accurate depiction of the Northern Lights, we needed to practice our technique. Laying down the pastel on its side, we pushed it in an upward motion towards the top of the paper, lifting up as we went. Then we tried blending different colors on top of each other.
Once we created our Northern Lights on black paper, we decided that since there is so much interesting wildlife up there, we should include some in our work. Of course if we were going to include wildlife in our pictures, they would have to be silhouettes! We learned all about silhouettes and why they look so dark when there is light coming from behind them.
The results of this project were nothing short of breathtaking. Each student came out with a different, unique piece. Students from other grades enjoyed looking at them so much that they decided they wanted to make them too!
*To prevent smudging, lightly spray your child's work with fixative (or an aerosol hairspray) from about 12-16" of the piece.

Lesson 3: Planning for Sculpture
Project: Animal Parts
During this lesson, students learned the importance of planning their work before they create it and understanding the critical steps involved in engineering a freestanding form. A lot of thought goes into choosing subject matter, deciding which structural materials work best as an armature to support the end product, and tweaking & fine tuning the initial design in order to achieve desired visual effects.
The end product of this lesson is a paper mache sculpture of a new specie, invented by the student. It consists of the characteristics of at least 3 types of animals already existing in nature. Once finished with the project, students gave their specie a name and wrote a brief description about the animal's origins, where it lives, and what it eats... Watch out because some of them eat people!! This project was very time consuming but the students are very proud of their work, as they should be.


