Adapted Art
Lesson 1: Exploring Elements of Art
Project: Line, Shape & Texture Watercolor Resist
We listened to a story called Harold and The Purple Crayon by Crockett Johnson and discovered that Harold drew lines with his purple crayon in order to create pictures that illustrated his story. After talking about several types of lines, we picked our favorite ones and took our black crayon for a walk across our paper. The directions that the zigzag, curvy, and curly lines took indicated movement. Music and dancing creates movement too! We then listened to different types of music and took a white crayon for a dance across our paper as if it was moving to the music.
We then searched a painting called Bustling Aquarelle by Wassily Kandinsky in order to find what other elements of art we could add to our work. Texture was added using crayons and texture rubbing plates. Then we talked about all different kinds of colors and what kinds of emotions they remind us of. Students then filled in open areas between their lines, inside their shapes, and some even covered large areas with a wash of watercolor paint. Many of us found that our dancing white lines appeared like magic!


Lesson 2: Matisse - Painting with Scissors
Project: Cut paper still life
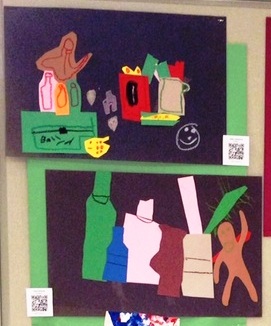
Students learned how to create the illusion of space in a work of art by overlapping objects. We analyzed Dishes and Fruit and The Horse, The Rider, and The Clown by Henri Matisse, looking at subject matter, color and the evolution of his style. Matisse developed a disease later in his life that prevented him from standing up and painting anymore, but he didn't let that stop him. He started "painting with scissors," as he called it. He started creating cut paper designs from his wheelchair or bed, and his assistant helped him assemble his masterpieces. Not only did we learn about how to include formal design elements and principles into our cut paper still life, but we also learned that disability and sickness does not mean that we are not capable of creating greatness.
Lesson 3: Pattern
Project: Tessellations
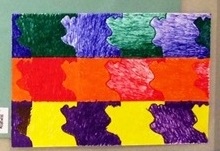
Tessellations are everywhere! We studied the work of M.C. Escher and his tessellations. The definition of a tessellation is any surface completely covered in repeating shapes without space in between them. Once we started looking around, we realized that we see them in our everyday lives. Everything from tile floors and brick walls to honey combs and turtle shells are examples. In Escher's work, many of the designs within his works are morphed from the tessellated shapes themselves.
In order to create our own tessellation, we cut out shapes, traced them onto our background, then added design to them. Many students morphed their shapes into existing objects or imaginative creatures, while others added a variety of abstract designs. Since this project is rather large and detailed, it is a rather lengthy process; but the outcome is sure to please.
Project: Tessellations
Tessellations are everywhere! We studied the work of M.C. Escher and his tessellations. The definition of a tessellation is any surface completely covered in repeating shapes without space in between them. Once we started looking around, we realized that we see them in our everyday lives. Everything from tile floors and brick walls to honey combs and turtle shells are examples. In Escher's work, many of the designs within his works are morphed from the tessellated shapes themselves.
In order to create our own tessellation, we cut out shapes, traced them onto our background, then added design to them. Many students morphed their shapes into existing objects or imaginative creatures, while others added a variety of abstract designs. Since this project is rather large and detailed, it is a rather lengthy process; but the outcome is sure to please.
Lesson 4: Spheres In Space
Project: Creating solar systems & galaxies
We have officially crossed into another dimension! Students were introduced to 3D drawing - rather than drawing 2-dimensional shapes, we are now drawing 3-dimensional form. We started out by learning the difference between a circle and a sphere. When looking around us, we noticed that we rarely see flat circles in real life. Most of the time we see spheres, such as basketballs, pumpkins, tree ornaments, and of course planets!
After deciding we would create our very own outer space drawings, we looked into what kinds of things exist in space. When analyzing our findings in photos from the Hubble telescope, we discovered that there are many galaxies made up of stars and planets. In fact, to our knowledge, there are infinite amounts of them... (Of course then we got a little side tracked by the mind bending question, "Where does space end?")... Within these galaxies of stars and planets, we noticed big "clouds" of color. We learned all about what these are made up of and why we see them.
Then we visited the Milky way. We looked at it from space, as well as figured out how to identify it from Earth. We zoomed in a little further on our own solar system and found that we have our own bright shining star - the Sun! We discussed concepts of Earth's rotation & tilt, daylight, darkness, seasons and what the Earth (as well as the other planets) look like when these factors come into play. From there we could understand how, as artists, to depict accurate and consistent light direction in a work of art. ISN'T IT AMAZING HOW ALL OF THESE THINGS CONNECT!?
Here comes the fun part! We first created a background that looks like a Hubble telescope photo of distant stars and galaxies using chalk pastels and splattered tempera paint. Then we traced circles, gave them color and texture with pastels, and added light and dark values. Students chose which direction the light was coming from in their piece and glued their planets down accordingly. The results were mind blowing and have been attracting a lot of attention from other students and teachers!
Lesson 5: Relief Sculpture
Project: Low relief yarn sculptures
We continued bridging the gap from 2-D to 3-D art. We started by studying various relief sculptures from work by the Ancient Egyptians to Classic Greek style and Gothic Cathedral friezes to modern day work. There are two different types of relief: high and low. High relief sticks out further from its background, almost becoming visible from all sides, while low relief is still relatively flat and may only protrude out about an inch or two from its background. Students viewed a series of photos of examples of both and held up "high" and "low" signs to cast their votes on whether they thought each piece was high or low relief.
Once we understood the concepts of the artistic characteristics of the sculptures, we looked more into detail on the subject matter the artists chose. It became clear that the artists chose to represent what was important to them and/or what was going on in the world during the time period in which each work was created.
Students brainstormed people, places, and things that are important to them in order to choose their subject matter. Then they traveled from station to station in order to complete the project. At station 1, they drew a simple line drawing of their subject onto construction paper. At station 2, glue was applied (in a controlled manner) right over top of their pencil lines. Last, at station 3, students cut strands of yarn to be placed over their glue lines. The end product is a low relief yarn sculpture of something important to each student.
Lesson 6: Sculpture in the Round
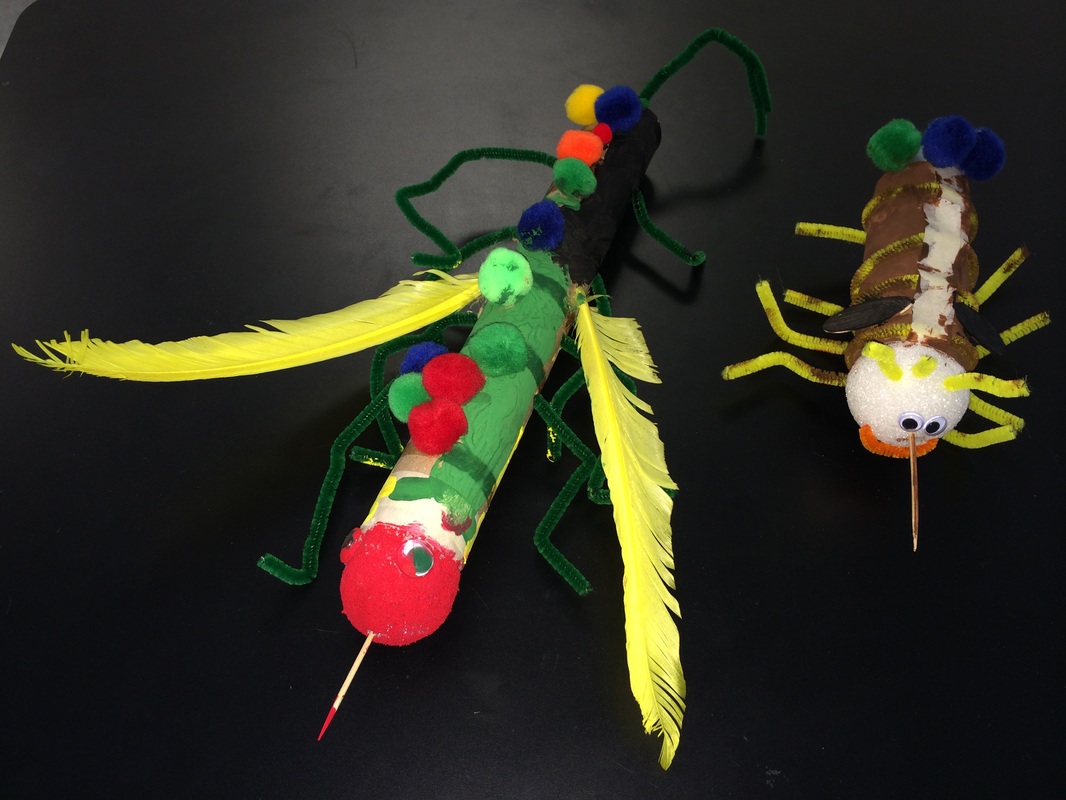
Project: Animal Parts
During this lesson, students learned the importance of planning their work before they create it and understanding the critical steps involved in engineering a freestanding form. A lot of thought goes into choosing subject matter, deciding which structural materials work best as an armature to support the end product, and tweaking & fine tuning the initial design in order to achieve desired visual effects.
The end product of this lesson is a paper mache sculpture of a new specie, invented by the student. It consists of the characteristics of at least 3 types of animals already existing in nature.
Lesson 7: Contrasts in Nature
Project: Birch tree watercolor resist
White birch is one of the most unique and beautiful trees we have here in New England. They create such a stark contrast with their surroundings, particularly against the sky. We used a watercolor masking technique to capture the natural beauty of these trees.
*I apologize for the layout of some of these photos, as they were rotated incorrectly when they were uploaded.


Lesson 8: Artist Study - Dale Chihuly
Project: Faux blown glass coffee filter cups
We took a look at the work of glass sculptor Dale Chihuly. Chihuly's work can be seen right here in Connecticut at Mohegan Sun! His beautiful large scale sculptures feature a variety of organic forms and vibrant colors, which are often illuminated, creating quite the viewing experience.
Since we discovered how dangerous it is to work with molten glass, we decided that it would be a good idea to create a similar look by using coffee filters, water based markers and spray starch. The result is a bowl that is a cup that is not only aesthetically pleasing, but functional as well - great for holding little treasures.


Lesson 9: Principles & Elements of Art
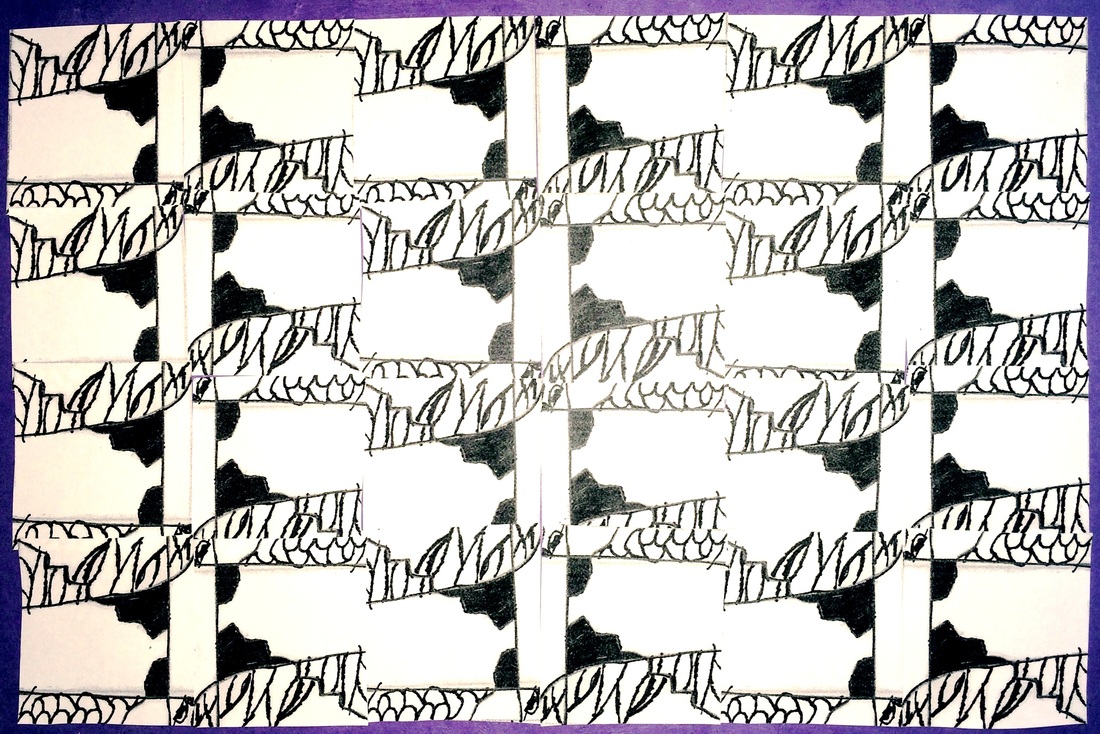
Project: William Morris inspired textile pattern designs
Students studied the work of William Morris and discovered repetition of the elements in his patterns. In fact you could draw a box around the sections of pattern that were repeated during the printing process due to the use of printing plates. Using that same concept, students created a design, using almost every element of art, within a single 2" square. The squares were then photocopied up to 25 times, cut out, then arranged together to create one large pattern, just like William Morris did in his textile designs. Students were encouraged to rotate the tiles and try multiple layouts in order to achieve different visual effects. The object was to purposefully utilize as many principles of art as possible in the overall design. The results look quite professional!
Lesson 10: Color Theory
Project: Complementary Flowers
Students studied the color wheel to discover complementary colors. Complementary colors are located directly across the color wheel from one another. They have a high contrast with one another and are often used together in things we see every day, such as signs & advertising, clothing, interior design, etc.
Students cut a photocopied picture of a flower into three separate pieces. Each section was to include one pair of complementary colors. Using oil pastels in primary and secondary colors, students colorized the photo and pieced it back together in order to bring it to life.


