Grade 7
Lesson 1&2: "What is art?" & Color mini lesson
Project: Colorized string pull prints
Students viewed a series of photos and decided whether or not the depictions were works of art. Each student shared their own opinion on their piece, in terms of design, giving reasons for considering it successful or unsuccessful. Some works were straight forward, such as a famous painting or sculpture. Others required deeper thought and consideration, such as Marcel Duchamp's "Fountain". Students really enjoyed listening to each others' opinions and were eager to participate in the discussion.
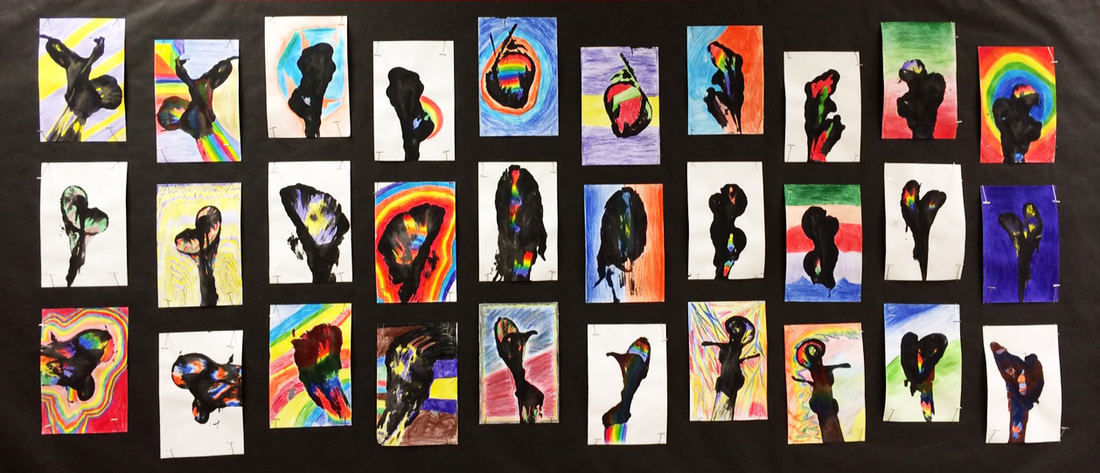
Students created prints by dipping a piece of yarn in tempera paint, laying it on half of a sheet of paper, folding the other half over top, then pulling the string out from between the layers of paper in one swift motion. Other than following simple directions in order to complete the project, students were told not to put much thought into what the piece was about or why they were making it. After the prints were completed, we discussed whether or not we considered them art due to the fact that there truly was no intended meaning or emotion connected to the pieces. Opinions varied. After time went by and students from other classes and age groups viewed and responded to the pieces, the artists started realizing that the viewers had in fact created their own meanings. A popular interpretation of these works was "love". 7th graders were in awe over the depth of the messages that particularly young students found in their work. We learned that art is a powerful form of communication. Messages can be specific and intentional as well as vague and unintentional. As long as we captivate our viewer, we are successful.
The second (mini) lesson, was on color. We studied the color wheel and students colorized their prints with color pencils. They were required to utilize the entire visible spectrum (rainbow), as well as complementary colors.
Project: Colorized string pull prints
Students viewed a series of photos and decided whether or not the depictions were works of art. Each student shared their own opinion on their piece, in terms of design, giving reasons for considering it successful or unsuccessful. Some works were straight forward, such as a famous painting or sculpture. Others required deeper thought and consideration, such as Marcel Duchamp's "Fountain". Students really enjoyed listening to each others' opinions and were eager to participate in the discussion.
Students created prints by dipping a piece of yarn in tempera paint, laying it on half of a sheet of paper, folding the other half over top, then pulling the string out from between the layers of paper in one swift motion. Other than following simple directions in order to complete the project, students were told not to put much thought into what the piece was about or why they were making it. After the prints were completed, we discussed whether or not we considered them art due to the fact that there truly was no intended meaning or emotion connected to the pieces. Opinions varied. After time went by and students from other classes and age groups viewed and responded to the pieces, the artists started realizing that the viewers had in fact created their own meanings. A popular interpretation of these works was "love". 7th graders were in awe over the depth of the messages that particularly young students found in their work. We learned that art is a powerful form of communication. Messages can be specific and intentional as well as vague and unintentional. As long as we captivate our viewer, we are successful.
The second (mini) lesson, was on color. We studied the color wheel and students colorized their prints with color pencils. They were required to utilize the entire visible spectrum (rainbow), as well as complementary colors.
Lesson 3: Project Hallway
Project: Mixed media collaborative hallway display of the visible spectrum
Following an introduction to the color wheel, students used magazine clippings, tempera paint, and oil pastel to create a 48x192" mixed media color study. Students worked in groups on this project. Each group was assigned 3 out of the 12 hues found on the color wheel. Each student created 3 monochromatic works of art. Phase 1 required them to clip a range of values of their assigned colors from magazines. We quickly realized which colors were the most and least commonly used in magazine print. After at least 50% of the picture plane was covered, we moved to phase 2. During this phase students learned how to accurately mix secondary and tertiary hues, as well as tints and shades of each of the 12 hues. The paint was applied to the pieces in the form of decorative design as well as hand prints. The 3rd and final phase required a little research. The class took a trip to the computer lab and searched Google Images for objects of their particular colors that exist in nature. We used oil pastels to draw enlarged versions of these objects over the remaining open space on our work. Many students were successful in camouflaging the elements from phase 1 through overlapping methods.
Please see our beautiful spectrum in the specials wing of SCS on the night of our end of trimester show. A photo will be posted here after the show is over. (For details on this show, click the link on the homepage of this site.)
Lesson 4: Introduction to Zentangles
Project: Zentangle drawings
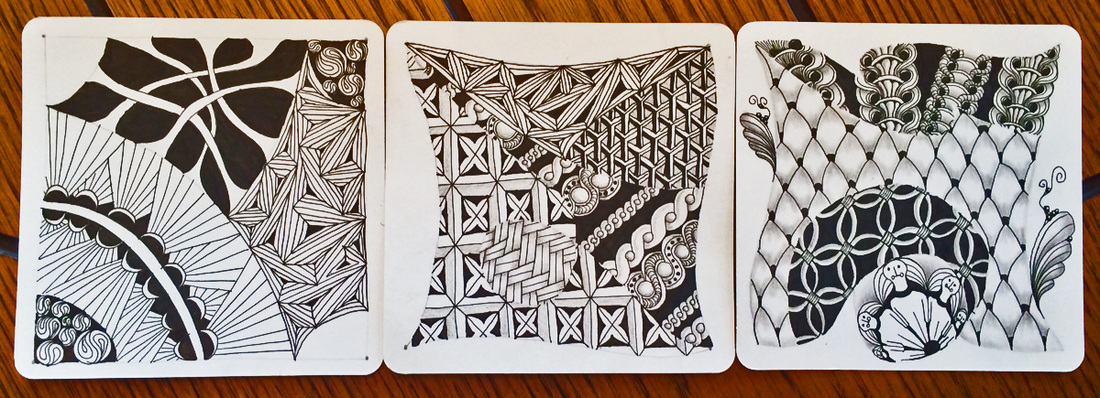
Zentangle is basically the art of organized doodling. Students were introduced to the method and philosophy of this art form and discovered that it broke many of the rules of traditional art making. (Or at least what they thought the rules were!) There is no wrong way to Zentangle and there are no mistakes. Tangles are created using permanent marker. There is no erasing. I decided to teach this lesson because many students worry too much about what their work "should" look like, rather than accepting the way that it actually looks. This inhibition is not abnormal. It is experienced by everyone in varying degrees. But when we learn to step out of our comfort zone, let our ideas flow, and accept/learn from our mistakes, we can really create something amazing.*
Tangles are a work in progress, as well as a very personal drawing experience, so I will not be publishing my students work on here just yet. Those who choose to share their work will be hanging it for all to see at our end of trimester show. Below are a few examples of tangles that I created, from which many students found inspiration.
There are many benefits of Zentangling, including:
* Unlike most art lessons, this lesson is graded strictly on participation & effort.
Project: Zentangle drawings
Zentangle is basically the art of organized doodling. Students were introduced to the method and philosophy of this art form and discovered that it broke many of the rules of traditional art making. (Or at least what they thought the rules were!) There is no wrong way to Zentangle and there are no mistakes. Tangles are created using permanent marker. There is no erasing. I decided to teach this lesson because many students worry too much about what their work "should" look like, rather than accepting the way that it actually looks. This inhibition is not abnormal. It is experienced by everyone in varying degrees. But when we learn to step out of our comfort zone, let our ideas flow, and accept/learn from our mistakes, we can really create something amazing.*
Tangles are a work in progress, as well as a very personal drawing experience, so I will not be publishing my students work on here just yet. Those who choose to share their work will be hanging it for all to see at our end of trimester show. Below are a few examples of tangles that I created, from which many students found inspiration.
There are many benefits of Zentangling, including:
- increases creativity & problem solving
- creates a sense of peace and calm ("Zen")
- lowers stress
- quiets the mind
- produces a sense of accomplishment, satisfaction & self confidence
- increases focus & concentration
- improves eye-hand coordination, memory & sleep
* Unlike most art lessons, this lesson is graded strictly on participation & effort.
Lesson 5: Clay Bowls
Project: Creating functional bowls out of clay
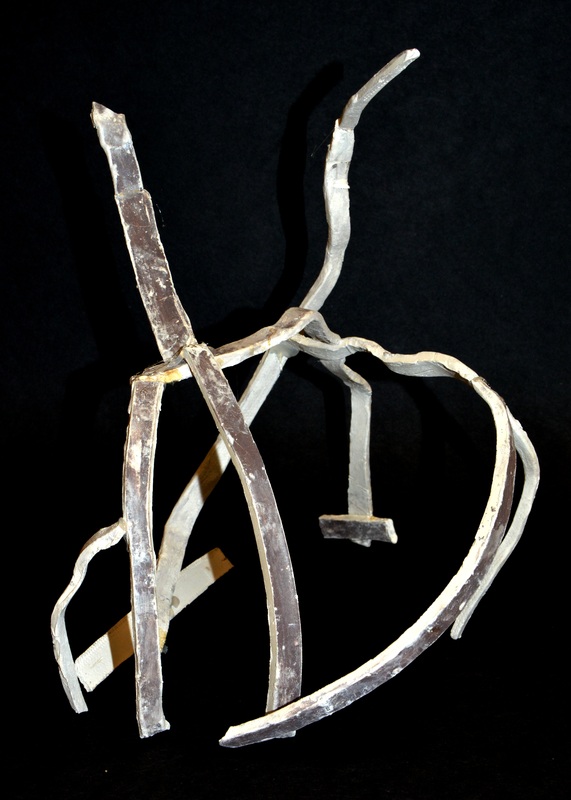
Students rolled out slabs of clay, molded them into a bowl shape, then trimmed a foot. We learned about the different parts of dinnerware and how to create them. After their pieces were fired, students added zentangle design elements to their bowls. Some students found that they had molded the edges of their bowl too thin for functional use. One student embraced this imperfection by breaking the bowl into smaller pieces and reassembling them as an abstract sculpture!
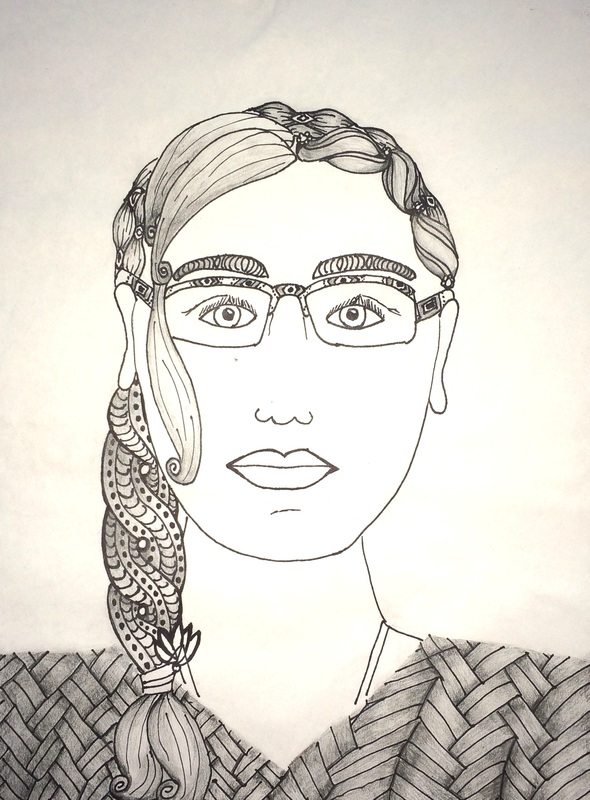
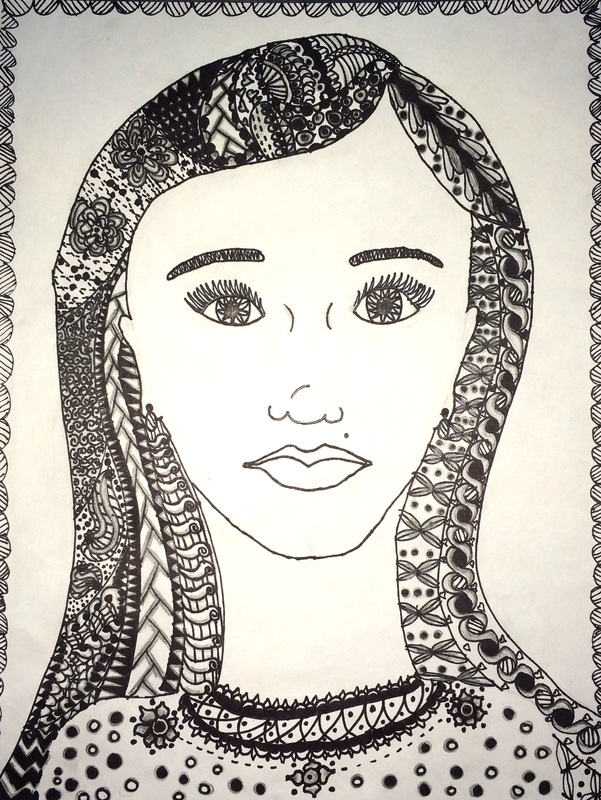
Lesson 6: Self Portraits
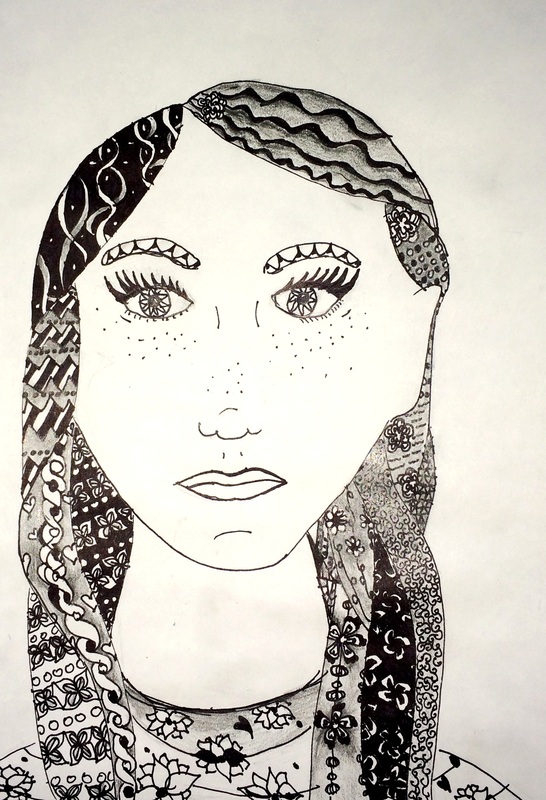
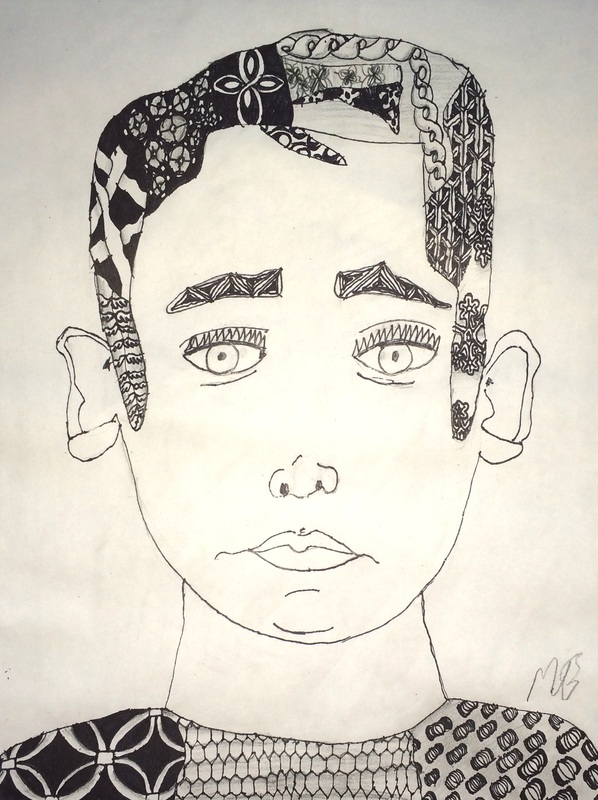
Project: Zentangled Self Portraits
Details coming soon...

Lesson 7: Clay Slab Construction
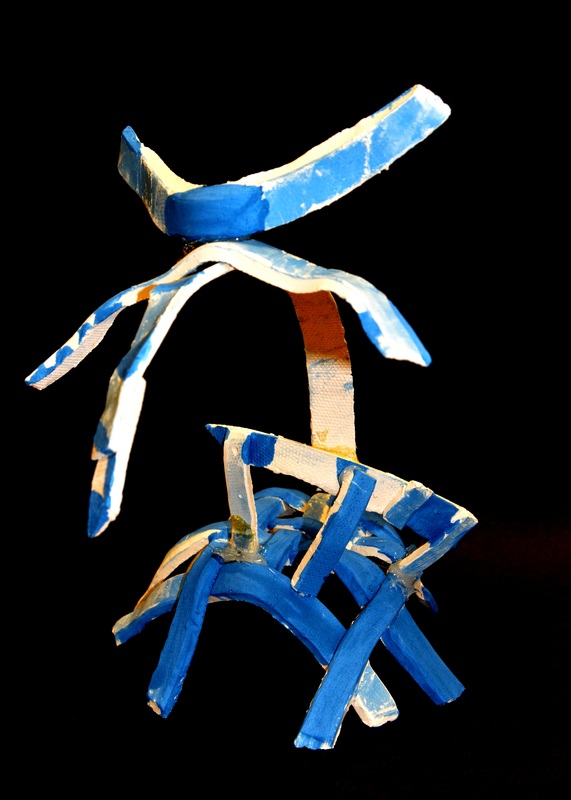
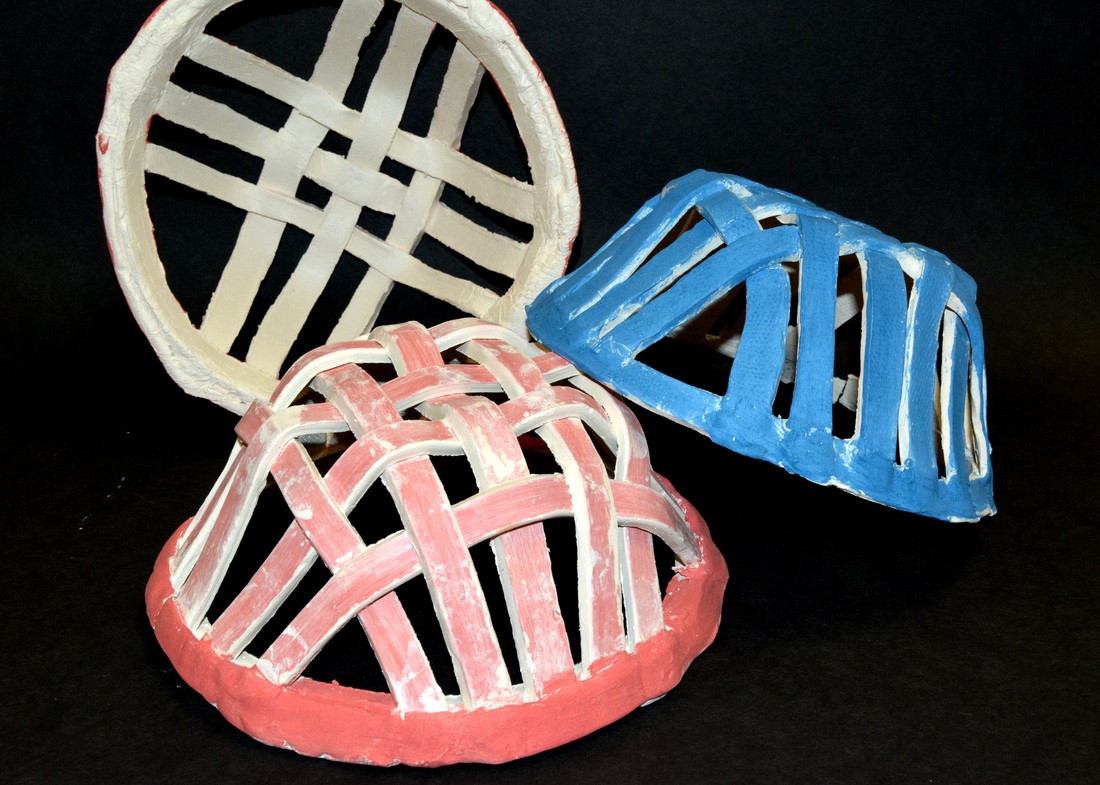
Project: Clay Basket Weaving
Although many of our everyday, functional dishes are typically thrown on a potters wheel, we can create decorative (and somewhat functional) bowls by using clay slab construction techniques. To create a bread/fruit basket, students rolled out slabs of clay, added underglaze to pigment the clay, cut 1/2-3/4" strips and then weaved them together over a bowl form.
The construction process challenged students' logic & organizational skills, while the clay itself taught a very cut and dry lesson (literally) about taking individual responsibility for their work. Working with thin slabs of clay, especially over a prolonged period of time, is no easy task. In order for the clay to perform correctly during the process, students had to manage a delicate level of moisture within the clay. If it was too damp, the piece would not be rigid enough to support itself. If it was too dry, the piece would crack and break during construction. Since this was the first time these 7th graders were facing these challenges, the results varied.
While stress levels began to rise through the roof, tension in the room could be cut with a knife, and worry bumps were forming on the foreheads of every student, I noticed something. Students began looking around, desperate for strategies to save their pieces from self destruction, and rather than asking me to help them "fix it", they came together and worked side by side, hand-over-hand to overcome the hurtles of slab construction. I watched in amazement as the completion deadline rapidly approached; students selflessly set their own work aside to help others salvage their pieces.
In then end, many came out with woven bowls and some with incredible sculptures that were assembled from broken slab strips. But every student ended this project with an overwhelming sense of pride.
Lesson 8: Converting 2D art into 3D
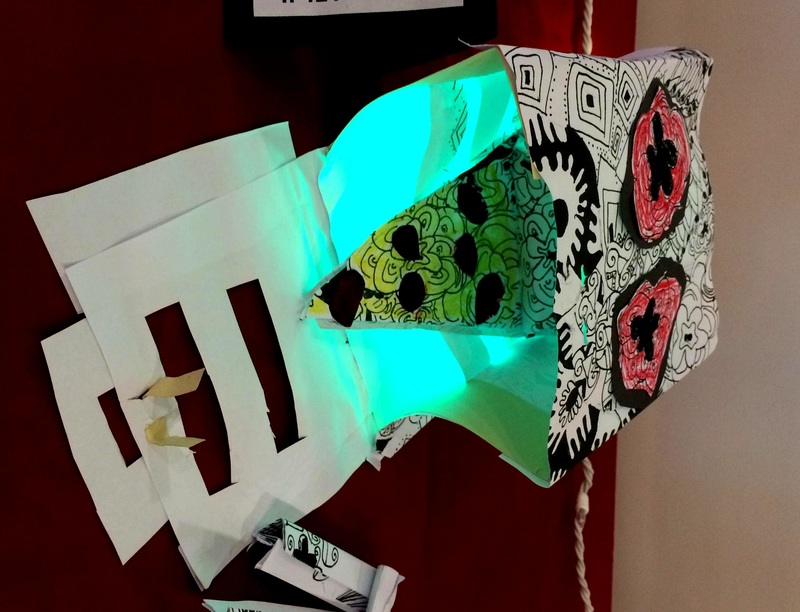
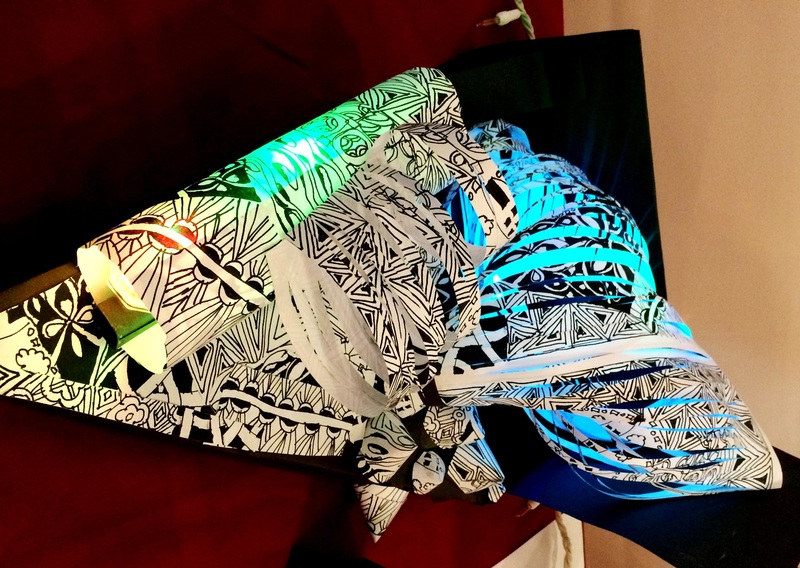
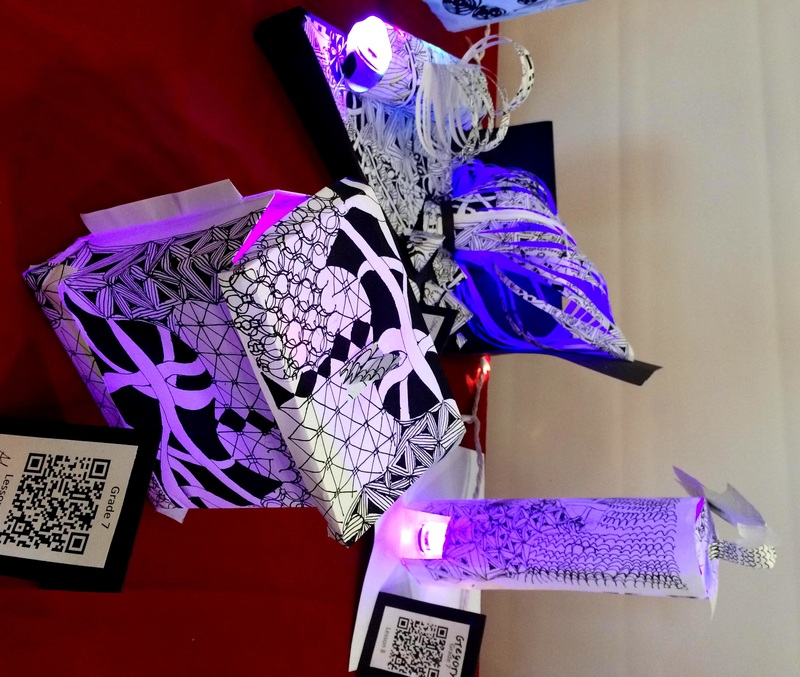
Project: Zentangle paper enclosures
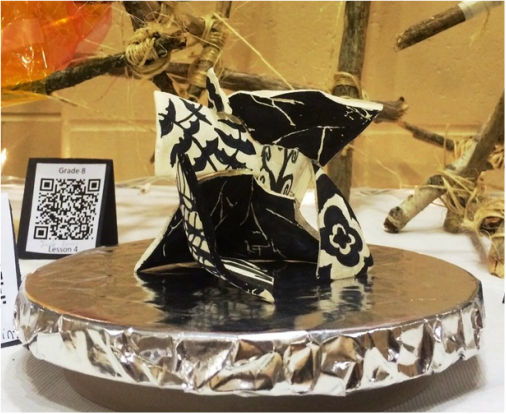
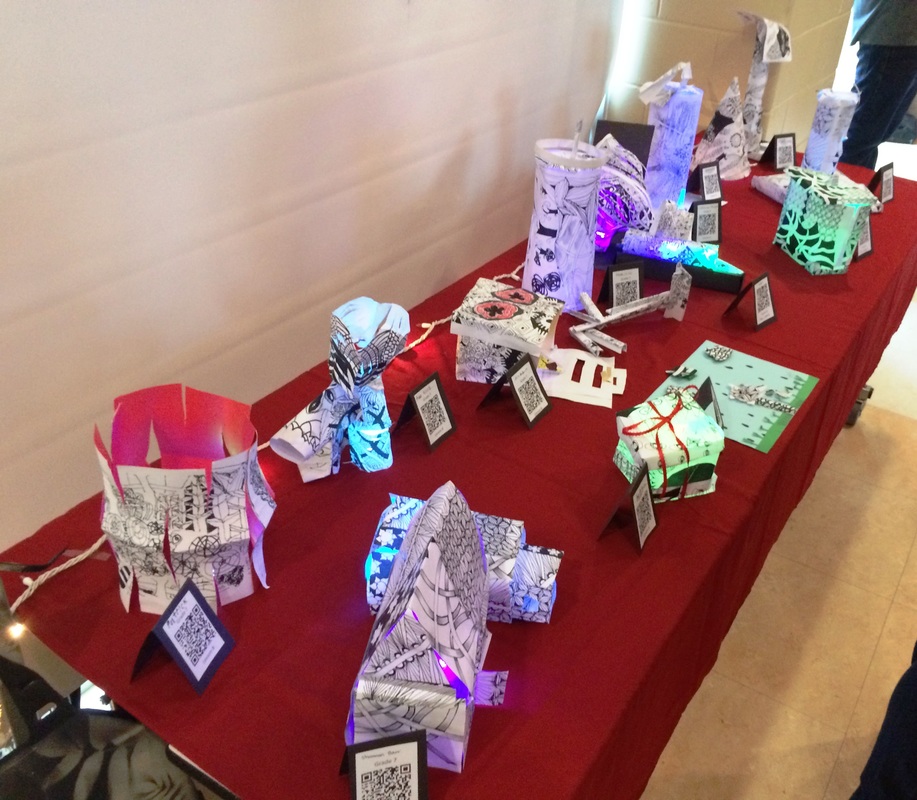
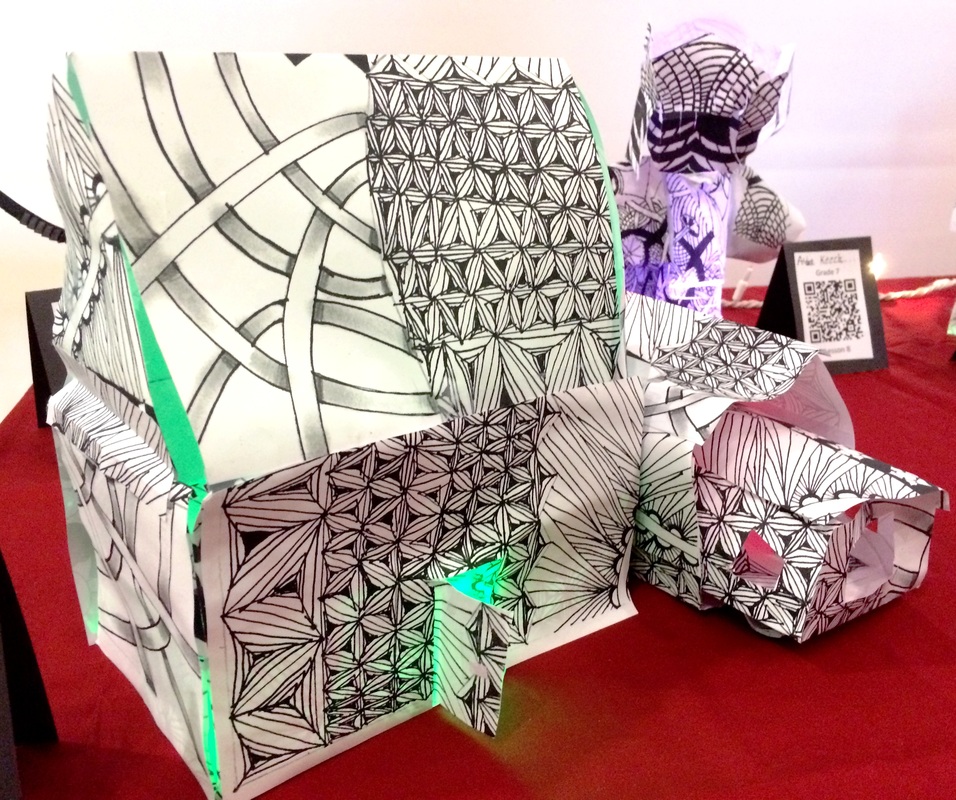
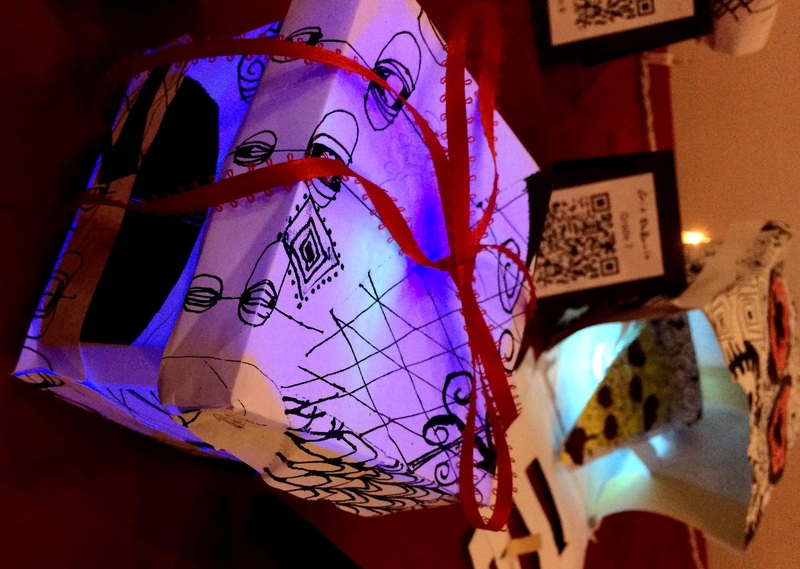
Students were introduced to Zentangle and created tangles on 8.5x11" paper. The papers were photocopied numerous times in order to create enough paper material for students to create a 3D sculpture with. The object of the sculpture was to be able to enclose something inside of it. At the art show, we enclosed color changing LED lights, which brought a whole new element - color - into the composition. Photos in no way do these projects justice. Some of the students went into great detail with their sculpting and even created interactive pieces.
** I apologize for the presentation of some of these photos as they have been rotated incorrectly when they were uploaded!
Project: Zentangle paper enclosures
Students were introduced to Zentangle and created tangles on 8.5x11" paper. The papers were photocopied numerous times in order to create enough paper material for students to create a 3D sculpture with. The object of the sculpture was to be able to enclose something inside of it. At the art show, we enclosed color changing LED lights, which brought a whole new element - color - into the composition. Photos in no way do these projects justice. Some of the students went into great detail with their sculpting and even created interactive pieces.
** I apologize for the presentation of some of these photos as they have been rotated incorrectly when they were uploaded!
Lesson 9: Fashion Design
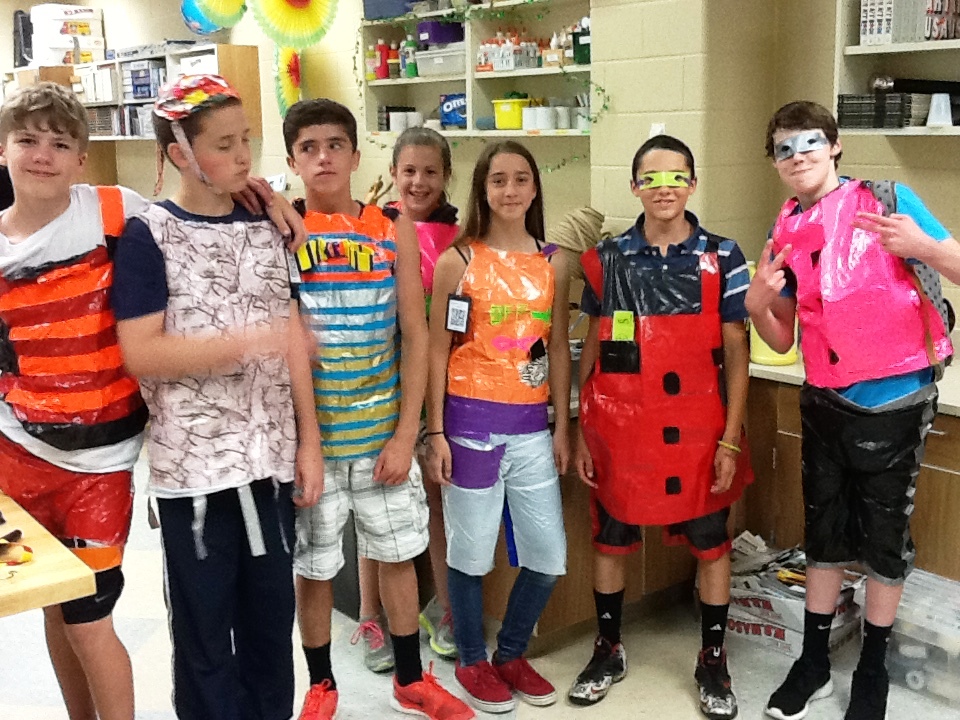
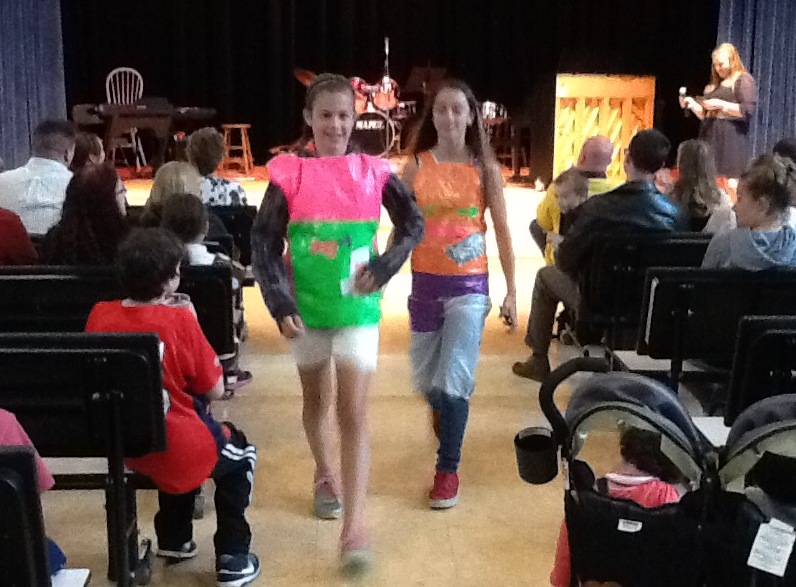
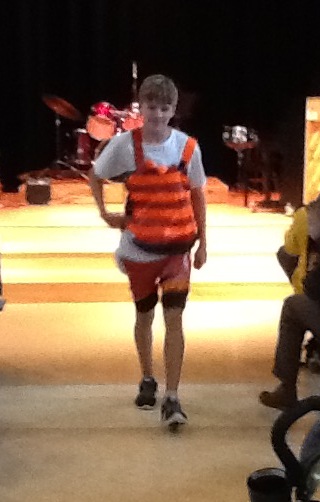
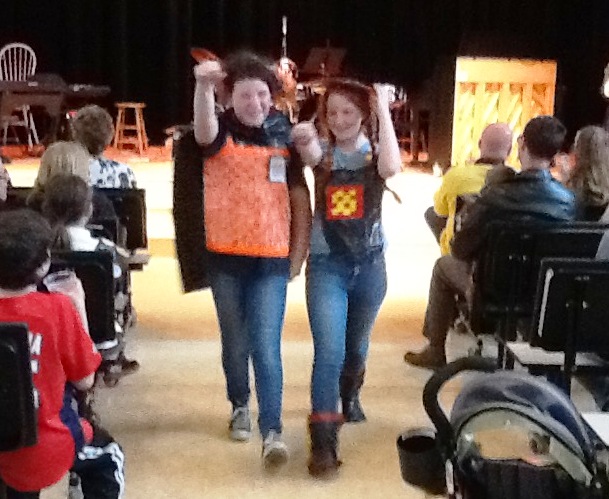
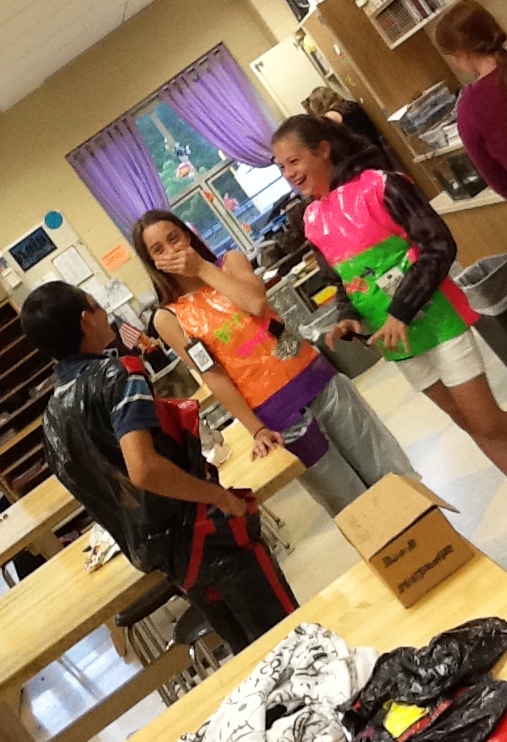
Project: Duct Tape/Garbage Bag Fashion Show
Students partnered up and designed outfits and accessories for themselves/one another and then created them using duct tape and garbage bags. They had the opportunity to strut their stuff at both the in-class and showcase fashion shows. Outfits were graded based on complexity, effort, craftsmanship, and participation with partners.
To be honest, since participation in the showcase fashion show was not required, I was worried that most students would shy away from the catwalk. When we first started the project, they didn't seem thrilled about presenting their silly ideas in front of 150+ people. By the time they put hours of effort into their work, most of them didn't even think twice about showing off their unique style. I'm happy with the way the pieces came out, but more importantly, I'm so proud of my students for building the confidence to present themselves and their creations in front of so many people. That takes guts! - and a dash of a sense of humor ;)

Lesson 10: Color Theory
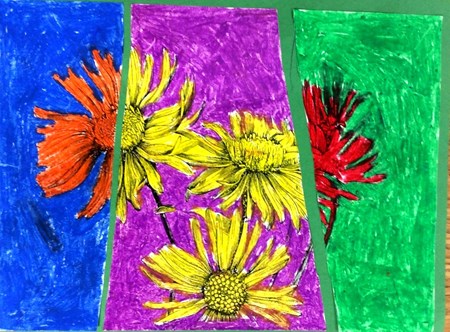
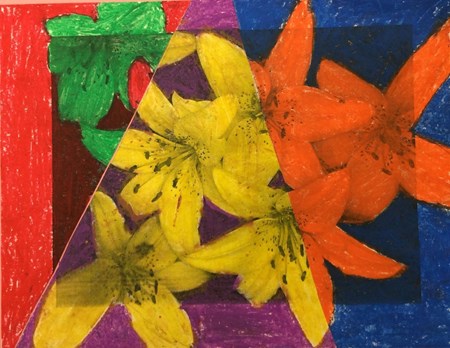
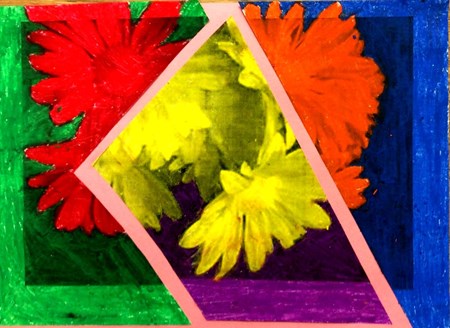
Project: Complementary Flowers
Students studied the color wheel to discover complementary colors. Complementary colors are located directly across the color wheel from one another. They have a high contrast with one another and are often used together in things we see every day, such as signs & advertising, clothing, interior design, etc.
Students cut a photocopied picture of a flower into three separate pieces. Each section was to include one pair of complementary colors. Using oil pastels in primary and secondary colors, students colorized the photo and pieced it back together in order to bring it to life. This was a quick bonus project that students completed in the final days of the school year.